• Home
  • About
  • Contact
    • Category
    • Category
    • Category
  • Shop
  • Advertise

FOLLOW ME @LUPABEE

facebook twitter instagram pinterest bloglovin Email

Lupa Bee

Beauty Fashion Travel


Check out my Youtube Channel:  https://www.youtube.com/channel/UCd3XrMN4WBRPNmfErR4Uf0Q 

Thank you for stopping by!

XO LUPA
Share
Tweet
Pin
Share
No comments


Every year around Christmas holiday, I place a huge Sephora order because they usually have some great deals and discounts. Most importantly they have a great selection of samples and a wider range of products to redeem your Sephora points. I normally don't like going in to Sephora to shop because its always so busy and chaotic. It just overwhelms me so I prefer to just order online. The only down side is when I want to purchase new products that I don't know my shade in.  Anastasia Beverly Hills Stick Foundation was a product that I had no idea which shade I would be in. I just randomly picked a shade in the hopes that it will suite my skin.

What this product claims:
"A multitasking, light-to-full-coverage cream stick foundation with a natural-looking, demi-matte finish"
"This highly pigmented, buildable cream stick foundation creates a flawless, natural looking demi-matte finish. The Stick Foundation is ideal for combination and oily skin, and the lightweight, easy-to-layer foundation delivers light-to-full-coverage, depending on the method of application. It’s designed to quickly and precisely apply all-over coverage, daily touch ups, or highlight and contour with ease. " - via Sephora 


Packaging:
My favourite thing about this foundation is the packaging because it's so sleek and easy to carry around without worrying about braking or spilling. It's in there signature black packaging with gold. It's also pretty small for a foundation so it will fit just right in any purses.


Colour/Shade:
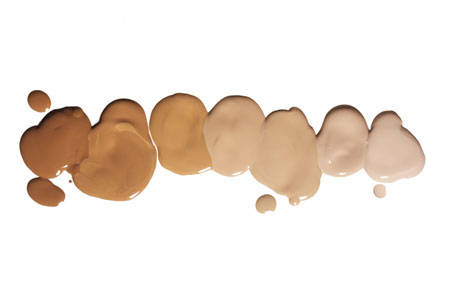
I found the above picture online which was really helpful. I knew I would be somewhere in the medium tan group. I randomly just picked 'Caramel' and luckily it turned out to be the perfect shade for me. It's almost too perfect because it is exactly my skin colour. Can we also take a moment for the wide range of shades they have. This foundation comes in 24 shades. No matter what colour skin you have, I'm sure you'll find a shade that suites you.


Coverage:
The coverage of this product is great. You can go from very little to full coverage depending on what you need. I normally go for a medium to full coverage but since this was a new product I was trying to use minimal product to see how it looks with just little coverage. The above picture is how it looks with little coverage. As you can see, some of my scars are still visible. This is definitely buildable so whether you want a full face glam or just a simple 'no makeup' makeup, you'll be able to achieve it with this product. However, you'll have to put a lot of product to get full coverage because when you blend the product it really blends into your skin very lightly. So if you need full coverage then you'll need to apply a lot of product. The good thing is that even if you layer it to get full coverage, you would assume a cakey look, but it actually just melts into you're skin with out looking cakey.


Formula:
It is a cream based product. It's soft and glides on the skin easily. This product on my skin was not at all matte in any way. When I applied it, even with a setting powder, it gave me a dewy finish. I have combination to dry skin and even though I prefer matte foundations, I quite liked this dewy look. After wearing it for a few hours, my face was really oily. So if you plan on getting this, I'd recommend you keep blotting papers with you at all times. 

Longevity: 
I wouldn't say this has a very good longevity because I did notice it started to get oily shortly after I applied it.

Overall: 
This is a good product but I wouldn't say it is the best. I love the packaging, the colour range and lightweight finish. It does stay true to most of the things it claims and I love the fact that it's build-able. The downside of this product is it's longevity, as I noticed my face got oily fairly quickly and the need to put a lot of product to get full coverage. Other than that, it is a good product. I personally am not a fan of a dewy look and I like full coverage without the need to apply so much product. Those are two big things that I look for when I'm purchasing a foundation. Because this foundation does not meet these two criteria, I have to rate it as a "good" foundation and not the "best". If you like a dewy finish and light coverage, this would be a great product for you. I will use this product until it's finish but I'm not too sure if I would repurchase it.

Price: C$33.00 + Tax

Rate: 7.5/10

SHOP HERE: 
Amazon: Anastasia Beverly Hills Stick Foundation 
Sephora: Anastasia Beverly Hills | Stick Foundation


Update May 2019: *Disclaimer - something happened to all my old blog posts that most of my pictures have been deleted, therefore the pictures used on this blog post are not my own.  Click the image for original source. For the sake of the posts I gathered the pictures from the internet since I no longer have these pictures (and products). I'm sorry if i'm referring to my old pictures and the review/post doesn't make sense. I'm sure you can find more info on the product/item on the website. If I'm using you're image and you'd like me to remove it, please let me know via email at lupabee@gmail.com . Thank you!

Share
Tweet
Pin
Share
No comments

My friend and I have been wanting to go to the Christmas Market for a while, after seeing so many beautiful pictures of lights and delicious food. When we initially planned on going a few weeks ago, it started raining, so we had to reschedule. Despite being so cold on the day we actually we went, we had a great time. The hype of this place is justifiable. Even though we don't celebrate Christmas and there wasn't a lot of things for us to do there, it was still nice to just walk around beautiful lights and cheery people. We also went to Cacao 70, which is like a Cafe type of place. My friend ordered a Crepe and I ordered a Fondue. The Crepe was mediocre but the Fondue was so bomb. I saw many other great things on the menu, so if you're ever around I would really recommend this place. The place is also beautiful and cozy.


Check out my Youtube Channel:  https://www.youtube.com/channel/UCd3XrMN4WBRPNmfErR4Uf0Q 

Thank you for stopping by!

XO LUPA
Share
Tweet
Pin
Share
No comments


Hello my beautiful readers!

When I first started blogging (which wasn't too long ago), I was absolutely clueless as to how to get started, but eventually I found my way around this blogging world and now I think I know the basics of blogging. I am no expert here, I just want to share the things I know. Before I get started I just want to say I do not own any of the pictures except for the first one with @begumsbeauty watermark. Click on the pictures to find the source.

Source

1. Brainstorm. The very first thing you want to do is brainstorm your ideas. What are you passionate about? What can you enjoy writing about? Keep in mind that this is not a one-post-and-I'm-done thing. If you want to have a blog that grows into something you need to keep adding content to it. So brainstorm your ideas about what you like and what you're interested in writing about. It doesn't have to be one specific topic. You can have multiple focus for your blog. For example, my blog is a beauty, fashion and lifestyle blog. To be honest, its mainly beauty and fashion based but randomly I have other posts that doesn't fit in the beauty and fashion category so I categorize it in the lifestyle section. It really doesn't matter as long as you love what you're putting on your blog.

Source

2. Name your blog. The second thing you want to is think of a name for your blog and the URL. What will you call it? This was honestly the hardest part for me, till this day I'm still struggling because i'm such an indecisive human. I keep changing the name of the blog. I would really recommend thinking of a good URL that you really like and won't change because when you change your URL too many times, you loose readers/followers. In terms of the name or the title of the blog, you can change it around.

Source

3. Get on the net. Once you have your ideas, URL, and title for your blog you are all ready to get on the internet to create your blog. This is my favourite part! There are many websites that allow free blogging services for example, Blogger, Wordpress, Wix etc,. The two I am familiar with are Blogger and Wordpress. I would recommend either or. When you have chosen which blogging service you want to use, all you have to do is create your account. The only thing you need for this is an email address and you're set.

Source

4. Be creative! Now that you have created your first blog, it is time to get creative. You can use the built in templates or customize your own. I would recommend you stick to a template the website provides, just to keep things simple and less overwhelming in the beginning. Once you get the hang of it, you can start being more creative and adding your own twist to your blog. There are plenty of free templates on the internet and videos that will help you design your blog the way you like.


Source

5. Write, write write! The technical stuff is all over! Now start writing (well i guess typing, but you know what I mean)!! It is important to have content on your blog. This is what will drive the readers. But don't write just to create content. Write because you love to write about your topic, hence you made this blog. You don't need to post everyday but if you have one or two good quality posts per week then it should be enough to start off. If you can write good quality posts everyday then by all means go right ahead.

Source

6. Good photographs. This is actually key to being a good blogger. Sometimes people will just come to your blog because you have nice pictures. Good photos attracts traffic. Ask yourself, is your blog visually appealing? With the growing use of smartphones, almost everyone can take great pictures so it is important that you make sure your blog is not lacking good quality pictures. When I started blogging, I had horrible pictures and just terrible editing skills and I new that to attract readers I needed to improve my photography and editing skills. There's just so many blogs out there, that people will simply not tolerate looking at poor quality pictures. Not saying you need to buy a DSLR for your blog, you can take great picture with your smartphones, but just make sure the lighting is good and the editing is decent. It just takes practice but it's not complicated.

Source

7. Do not plagiaries  In relation to photographs, if you use another persons picture or ideas, always always ALWAYS cite it and give them credit. There is no room for plagiarism in the blogging world. For example, for this post I have used pictures that I googled and thought were visually appealing for this post. I added the link of the original site underneath each picture and mentioned in the beginning of the post that I do not own these pictures. Here, I not only provided readers with the link to the original site but I also told the readers that these pictures do not belong to me. Everyone works hard to put their work out there and a person who gives credits to others for their work just comes out as a genuine blogger.


Source

8. Networking. Now that you have this great blog with your wonderful posts how do you attract readers? There a few ways to do this. Most common way to do this is sharing it on your social media. This is something I really struggle with because I started my blog as something that's really private. I mean yeah, its on the internet for the whole world to see but since I never share it on my social media and no one really knows about it. I feel like its really private and I kind of like it like this. Another way for you to attract readers is by commenting on other peoples posts. Don't be annoying and ask them to check your blog out but leave genuine comments on other peoples posts that interest you. Trust me people will check your page out this way rather then if you were to ask them to check it out. Lastly, connect your blog to platforms like Bloglovin', Pinterest, Tumblr and leave the link of your blog on your bio's.

Source

9. Be patient. Only if you're really lucky, then it probably will not take you too long to get ahead in the blogging world fast but for the most part it takes time. There are millions and millions of blog out there, it will obviously take some time for your blog to make it to the top. Don't loose hope because everyone started from the bottom. Be patient and enjoy the process. Write about things you love. Make it a hobby and don't worry about how many followers you have and who will read it and what people will say. Just keep writing your heart out.

Source

10. Where do we go from here? Now that you have established your blog and you are regularly posting, you can start earning money. Take this as a grain of salt. You can potentially make money with Google Adsense but it takes a long time. Basically, once you have a certain amount of content, you can apply for Google Adsense and if you get approved then you can put adds on your blog, that will generate income. Now don't get too excited. The income is very minimum. You would have to be getting crazy amounts of traffic to get a decent income. There is no harm in applying for it and putting the adds up. Who knows one day your blog may have enough traffic to earn a living.

I hope you enjoyed my tips for new bloggers and how to get started. If you have any comments or questions please leave them below. 

Please don't forget to subscribe to my posts by entering your email on the "Follow by Email" section. You will get my latest posts straight to your inbox.

Share
Tweet
Pin
Share
No comments


As soon as Fall rolls in we are eager to take out our deep vampy lipsticks. Let's be honest though, some of us have them out all year long. MAC's Antique Velvet is your true deep maroon-brown lipstick. When I bought it I thought it would be a deep maroon. Kind of similar to MAC's Diva but its really different and similar at the same time. From the looks of it, it looks almost identical to Diva but once you put it on your lips its a very deep maroon brown.  


The lipstick has great colour pay off, the formula is matte but not drying and it lasts all day without the need for a touch up. The colour is so opaque that you only need one layer of it. It glides on very smoothly. Even though the colour is so beautiful and vampy, just perfect for fall, I actually have a hard time wearing it around my family. When I attend family events I try to avoid this lipstick. Only because the colour is so deep that my family thinks its scary (LOL). I think they think its too "loud" because they are just so used to the typical red and pink lipsticks. 


Dupe
The perfect dupe for this lipstick is Colourpop's Limbo. On some people Limbo looks much more brown. I also think LAX by Colourpop also looks very similar to Antique Velvet. The Colourpop Cosmetics lipsticks retail for about $6.00, with shipping they end up being around $10.00 each. Which is half of what you would pay for Antique Velvet. I love MAC Lipsticks, but if you can get a cheaper option to get the same product then why not? 

I hope you enjoyed this post and maybe this post could help you make a decision if you were thinking of purchasing this. Comment below and let me know what your thoughts on this product. Have you tried it?

Please don't forget to subscribe to my posts by entering your email on the "Follow by Email" section. You will get my latest posts straight to your inbox.

Thank you so much for reading!
Share
Tweet
Pin
Share
1 comments


We all know facials are expensive and sometimes just not worth it, because you can get a facial done and if you don't continue to take care of your skin everyday, you'll find yourself needing to go back for more facials, which can get pricey. Wouldn't it be so much easier if you could do your own facial at home without having to spend so much money and time and you will be able to do it as frequently as you need. I will be showing you step by step on how you can do a Facial at home with out spending any extra money. I will also include my skin care routine. You should not do facial everyday, only when you need it or every other week or even just once a month. It all depends on what kind of skin you have.


Step 1: Facial Exercise 
The first thing you want to do is warm up your face, so dirt and oil can easily come out. It is important to do this step because it will warm up all the muscles in your face and this will help to bring the dirt and oil to the surface and also observe the moister.
Warm ups :
  • move your head up and down slowly
  • roll your head side to side
  • do some head rolls
  • do some shoulder rolls
Facial Exercise
  • do 4-6 of ceiling kisses - you want to move your head back as if you're looking up but not completely and make the kissing face, basically kissing the ceiling 
  • fill air in your mouth and move the air from one cheek to another, do this for 10 seconds
  • take two fingers, pout your lips and take the two fingers and press the pouted lips, do 4-6 of these
  • take three fingers in each hand and place it under your eyebrows and hold for 3 seconds and release
  • do the same thing again but this time don't release it, instead drag your finger towards your forehead into your hair line, do this 2 times.


Step 2: Cleansing
The next thing you want to do is cleans your skin. I use the Purity by Philosophy as my cleanser. This is my every day cleanser. I don't find this product doing anything great for my skin for the price, but it also doesn't do any harm which is why I like. You can use any cleanser you want, you don't have to use this cleanser. You can use the cleanser you already use. 
  • take a generous amount of the product and apply it evenly on your face 
  • gently rub the cleanser all over your face for 3-4 minutes
  • once you're done take a muslin cloth and run it under warm water 
  • then taking the muslin cloth wipe away the cleanser
I forgot to attach a picture of my muslin cloth, but you can use any face cloth and it will be fine. If you would like to purchase muslin cloth, The Body Shop has it.


Step 3: Exfoliate
The next thing you want to do is exfoliate. I use the Aveeno Skin Brightening Daily Scrub. I normally use this with my clarisonic but you don't need to. You can use any exfoliator, preferably the ones with micro beads. Exfoliating will help remove all dead skin. I use this scrub occasionally when I'm too lazy to do a whole facial.
  • apply a generous amount all over your face evenly.
  • rub the product for 3-4 minutes
  • take the muslin cloth/face cloth and wipe away the scrub


Step 4: Massaging
This is the fun part, where you get to massage your face. I use the Camomile  Sumptuous Cleansing Butter from The Body Shop. You need a slip on your face to be able to massage. You can use any types of oil (coconut oil is great).
  • take the cleansing butter on your fingers in both hand and start massaging the neck in circular motion, do about 4-6 of these 
  • massage down the neck, draining the fluid towards your chest, do this 4-6 times
  • take more cleansing butter on your fingers and make big circles on both of the cheeks in upward and outward motion, do 4-6 of these
  • do the same thing again but this time make smaller circles on both the cheeks, again in upward and outward motion 
  • take your knuckles and place below your cheek bones and slide it towards your ear, do this 4-6 times on both cheeks
  • take more cleansing butter, take your opposite thumb to your opposite jaw and make small circles starting from the chin area going towards the jawline into your ear, do 3 of these
  • do the same thing for the other side of your face
  • take your knuckles and start from your chin and push it towards your ears, do this 6 times
  • take both of your index finger and place it in the inner corner of your eyes and drag down your mouth, do 3-4 of these
  • take both of your hands and drag them starting in the center, going towards your ear
  • take your index finger and drag it outwards from the center of your eyebrow, do this 6 times
  • lastly make small circles on your forehead going outwards to the hair line, do this 6 times 
Doing this massage will help drain out all the dirt and toxin from your skin


Step 5: Face Mask
We have to bring the moisture back. Use any kind of mask, preferably something not too harsh. I use the Vitamin E Sink-in Moisture Mask from The Body Shop. This mask really helps bring back the moisture and makes my skin soft. 
  • apply even amount of your mask
  • leave it on for 10-15 minutes
  • relax
  • after 10-15 minutes take the muslin cloth and take off the mask


Step 6: Toner
The next thing you want to do is tone your face. This will get rid of anything you missed while wiping your face with the muslin cloth.  The toner I use is the Tea Tree Skin Clearing Toner from The Body Shop. I love this product because it has tea tree. You can use whichever toner you have.
  • take a cotton pad and pour the toner on it
  • apply it all over your face


This is optional but it's part of my skin care routine. Sometimes I like to use Witch Hazel instead of the toner. I do this only when my skin is in a bad condition. Witch hazel helps to heal my acne wounds. 


Step 7: Moisturize
The last step is to moisturize your face. I'm currently using Pond's Moisturizer for dry skin. This smells amazing and keeps my face moisturized all day long.


This is also optional but it is part of my skin care routine so I am adding it. This is virgin coconut oil. I know most people don't like to use oil on their face and trust me I was one of those people but this stuff is really good. Sometimes I use this a moisturizer.

I hope this is helpful to you so you don't need to spend so much money on facials. Comment below and let me know what your favourite skin care product is.

Thank you for reading!

.L

Share
Tweet
Pin
Share
No comments

I know i'm super late with the monthly favourites post this month, but it's better late than never. This month I haven't been loving anything different than what I mentioned in my previous monthly favourites. I did manage to pick out a few things that I did notice I used more in the month of November. One product from the past, one product from the present and one product (i'm so tempted to say future but) I recently fell in love with.


PAST


Okay lets start with the love from the past. This is the ELF Cosmetics Blush and Bronzer in the shade Turks Calcos. This was on my favourites list in one of my very first post (from two years ago). I loved it the moment I tried it. The colour is a beautiful dark brown shade with shimmer. It is very pigmented, you have to be very gentle when applying. It works great as a powder contour and a bronzer. I use it more for contouring because it's too pigmented for bronzing. If you want to use this as a bronzer you have to basically just touch the product with your brush and that will be enough. The only thing some people might not like about this product is that it has shimmer, but the shimmer is barely noticeable after you apply it. I haven't used the lighter shade (blush) so I can't say much about it. It comes with a pretty big mirror, which is always a good thing.


Look how beautiful the colour and pigmentation is.


PRESENT


This product I been loving for the past a few months, but I wanted to give it some time before adding to my favourites list. It's a pretty new addition to my collection and it is the Anastasia Beverly Hills Brow Wiz in the shade Dark Brown, previously known as Brunette. The rave about this product is insane but it definitely deserves the love. The formula is so creamy, very easy to use, does not get messy, the colour is just right for my medium brown skin. The brow wiz has a spooly on one end, and it is the perfect spooly for your eyebrows. Usually the ones you get separately are too big. What I love the most about this product is that you can control how much and how little product you want to use.

FUTURE


Can a monthly favourties be complete without a MAC lipstick? (lol guilty pleasure) I waited a long time to get this product because every time I went in the store it was always sold out and I didn't want to order online because of the shipping cost. Anyways, so I finally went into MAC and it wasn't sold out. This is the famous Whirl. The ultimate key to Kylie Jenner lips. It is a muted rose shade with brown undertone. The formula is creamy with a matte finish. It is very similar to MACs Twig, Taupe and Velvet teddy, which I own. I'm a bit of a makeup junkie but I don't think anyone who owns any one of those lipstick need to get this one. You can just use a dark brown lip liner and you will be able to get the same colour as Whirl. I love this lipstick because you can use it on a regular basis, looks great with any makeup looks.

That is all for this month. What have been loving this month? 

Thank you for reading!

L.


Share
Tweet
Pin
Share
No comments

Products:

Anastasia Beverly Hills DIPBROW™ Pomade in the shade Ebony

Anastasia Beverly Hills Brow Wiz in the shade Dark Brown

Anastasia Beverly Hills Brush #14

MAC Brow Set in Clear


I used to never fill in my eyebrows because I'm blessed with naturally full brows (Alhumdulillah). I do have small bald spots on my eyebrows, it's barely noticeable. When you do a full face of makeup it just looks incomplete if you don't shape up your brows. Big and thick brows are very much in right now. I try not to go overboard like some people do. I prefer to make the shape as natural looking as possible because I feel like it changes my whole look if I make the shape big. However, I do like making it dark, so it looks more thicker but remains my original shape.

Anastasia Beverly Hills is hands down the best when it comes to brow products. I haven't tried a lot of their products but there is so much rave about their products in the market so I'm sure you have an idea of their quality. Little goes a long way. I bought their DIPBROW™ Pomade a year ago and I use it on the regular but still haven't gone half way. I bought it in the shade Ebony, which is very dark, I believe its one of the darkest shade before Black. It is very pigmented, so it really helps to deepen and darken the brows making it look very thick and pigmented. The formula is very creamy, very easy to use and it doesn't get messy at all. The best thing about it is that it's waterproof. I bought the Anastasia Beverly Hills Brush #14 because the Pomade doesn't come with a brush (which kind of sucks), but you can use any angled brush and a spoolie brush and you'll get the same result. The brush is like any other high end brush.  

I bought the Anastasia Beverly Hills Brow Wiz in the shade Dark Brown recently, because the Dipbrow Pomade shade Ebony is very pigmented so when I outline the brows to shape it, it can get a little bold. The Brow Wiz helps to lightly feather out the product and shape the brows with out making it look harsh.

Lastly I brush the brows with MAC's Brow Set to set the brows. It's a normal brow gel that helps keeps your brows put. My brow hair moves and changes the shape, so using the brow gel really prevents it from moving around.


How I do my brows:

I do my brows just like everyone else.
- first I brush the brows using the spoolie end of the brush
- then taking the brow wiz I outline the shape of my brows and lightly feather it to fill in the brows
- then I go over the brows with the dipbrow pomade the thicken it. I love doing the tail using the brush and pomade, it really helps to create the perfect tail.
- then I brush the brows to blend everything in
- lastly, using the brow set, I set the brows
Optional: clean up using a concealer


I hope this was helpful. Thank you for reading!
Share
Tweet
Pin
Share
2 comments


October is the month you fall in love with Fall all over again. I was not looking forward to the cold weather but I was definitely looking forward to the beauty of Fall. I love the colorful trees, the fall fashion trends, the deep vampy lipstick looks and more than anything I love how festive everyone is. October was a very stressful month for me and that's probably why it feels like it flew by so fast. In fact this whole year has gone by so quick. Only one more month until it's 2016.

It was a little hard for me to find this months favorites because I was still loving all the products from September and didn't really have anything new. So I decided to pick things that I have been using on the regular. These products need much more love.


First up is a new MAC lipstick addition in the shade Antique Velvet. It is a very deep maroon and brownish color, This color is perfect for fall. It is very bold and deep. I will be doing a review on this lipstick alone because I love it that much. (lol)


Loreal Voluminous Original in Blackest Black is the mascara I have been using since the end of summer. With this mascara you won't need false lashes. It gives so much volume to your natural lashes that it almost looks as if you're wearing false lashes. 

I was breaking out a lot during the summer and I had no idea what was causing it. So I decided to completely stop using all the current face products. Eventually, I realized I was breaking out because of the Anastasia Beverly Hills contour palette. When I stopped using all the current face products, Pond's (dry skin cream) moisturizer was one of them. I was really sad because I really loved this moisturizer and I have been using it for an year now. I started using this moisturizer around the same time I started using Anastasia Beverly Hills contour palette, so I wasn't sure which one was breaking me out. Recently I started going back to this product and I love it. It keeps my skin soft and moisturized during this dry weather.


Maybelline Fit Me Concealer in 25 is a new product that I have been trying out. My cousin recommended to me saying it is a dupe for MAC pro-long wear concealer. I was thinking about buying MAC pro-long wear concealer and I had a sample that I was trying out. I went ahead and bought Maybelline Fit Me Concealer because it was a cheaper alternative (lol). Honestly speaking I actually like this one better than MAC, 


If you read my blog on the regular you'd know I suffer from dry lips. Fall and Winter are usually brutal for my lips. I got the (Malin+Goetz) mojito lip balm in my Ipsy bag sometimes last year. I didn't use it then because I had a few lip balm open at the time. I recently started using it and it is so moisturizing. It is very thick and I normally don't like heavy lip balms but this is great for when i'm at home or going to bed. I leave it on for overnight treatment and it keeps my lips soft and moist.

Chloe Eau De Parfum by Chloe is my current favorite perfume. It has a warmth in it's fragrance I been loving this scent in this weather.

FOSSIL Jacqueline Three Hand Stainless Steel Watch Gold Tone is the only accessory I wear now. I have a small wrist and this looks just perfect. It goes with all my outfits whether I'm wearing casual or formal.

Lastly, is my non beauty related item and that is a candle from Bath & Body Works. I love this candle. It smells like lavender and has the most refreshing scent.  I have it lit up almost everyday.

That is all for this months favorites. Thanks for reading : ) !


Share
Tweet
Pin
Share
No comments


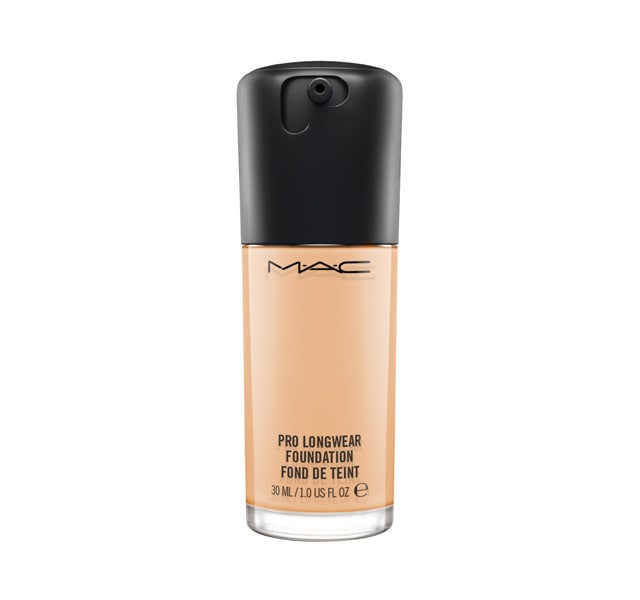
This is part 2 of the foundation dupe for MAC Pro-long wear Foundation shade NC 30 (Drugstore version). Check out the high end dupes of MAC Pro-long wear Foundation NC 30 here. 
This is a list of more affordable brands. I know how hard it is to find the right shade of foundation when doing online shopping, hopefully this list will help. Even when buying some drugstore products they don't allow you to try the products on before purchasing, so basically you just have to wing it. I have experienced this many times and always ended up with a totally different shade. If only I had done some research before and got a rough idea of which shades I should look into. This list of dupes should help you narrow your options so you don't make the same mistake as I did. I have also included some pressed powder and concealer as well.

Drugstore foundation shades for MAC Pro-long wear NC 30


RIMMEL LONDON -  CLEAN FINISH [Shade WARM SAND]

RIMMEL LONDON - LASTING FINISH 25 HOUR [Shade TRUE BEIGE]

MAYBELLINE - FIT ME LIQUID FOUNDATION [Shade HONEY BEIGE (320), GOLDEN BEIGE (240)]

MAYBELLINE - FIT ME SHINE FREE FOUNDATION [Shade NATURAL BUFF (230)]

NYX - STAY MATTE BUT NOT FLAT [Shade MEDIUM BEIGE ]

NYX - CONCEALER STICK [Shade MEDIUM]

NYX - HI DEFINITION PHOTO CONCEALER WAND [Shade MEDIUM]

L'OREAL - TRUE MATCH SUPER BLENDABLE PRESSED POWDER [Shade NUDE BEIGE (W3)]

L'OREAL - TRUE MATCH SUPER BLENDABLE LIQUID FOUNDATION [Shade NUDE BEIGE (W3) ]

REVLON - COLORSTAY COMBO/OILY [Shade WARM GOLDEN]

REVLON - PHOTO READY SPF 20 [Shade GOLDEN BEIGE]

REVLON - COLORSTAY WHIPPED CRÈME [Shade WARM GOLDEN]

NEUTROGENA - HEALTHY SKIN SPF 20 LIQUID FOUNDATION [Shade WARM BEIGE]

BOOTS NO7 - NO 7 STAY PERFECT SPF 15 [Shade DEEPLY HONEY]

COVERGIRL - ULTRASMOOTH [Shade GOLDEN TAN 857]


I will continue to add on to this list. All of this was found using Temptalia's Foundation Matrix. If you're looking for a different shade match please go check her out. Also if you would like me to do a dupe list for any other product please comment below and let me know.


I really hope this was a little helpful. Thanks for reading.


Share
Tweet
Pin
Share
1 comments
Newer Posts
Older Posts

About Me


Hello: ) Welcome to my little space on the internet where I share my love for fashion, beauty, travel and food. I also make vlogs on Youtube. Feel free to check out my channel & thank you for visiting! xo


Connect With Me!

  • youtube
  • instagram
  • twitter
  • facebook
  • pinterest
  • Google+

recent posts

Popular

  • Find your foundation colour in different brands # 1 (for MAC's NC 40/42)
    Find your foundation colour in different brands # 1 (for MAC's NC 40/42)
    Hello my beautiful! Firstly, I apologize for not being consistence with my blogging.  As from the title you already know what this post ...
  • Mother's Day Gift Ideas! (Very Affordable)
    Mother's Day Gift Ideas! (Very Affordable)
    With Mother's Day just around the corner, I know most of you, like me, are searching for gift ideas for our precious mother. Even...
  • Rimmel BB Cream 9 in 1 Skin Perfecting Super Makeup VS. L'Oreal MagicSkin Beautifier BB Cream + REVIEW
    Rimmel BB Cream 9 in 1 Skin Perfecting Super Makeup VS. L'Oreal MagicSkin Beautifier BB Cream + REVIEW
    Hello my beauties! I'm here with another review for y'all. BB creams were never my thing, thats why I just purchased my fi...
  • Find your foundation shade in different brands # 2 | MAC Pro-long wear Foundation NC 30 | High end Foundation
    Find your foundation shade in different brands # 2 | MAC Pro-long wear Foundation NC 30 | High end Foundation
    I previously done a post on MAC's NC 40/42 ( here ), where I listed different foundation/pressed powder/loose powder from differe...
  • Find your foundation shade in different brands # 2 | MAC Pro-long wear Foundation NC 30 | Drugstore Foundation
    Find your foundation shade in different brands # 2 | MAC Pro-long wear Foundation NC 30 | Drugstore Foundation
    This is part 2 of the foundation dupe for MAC Pro-long wear Foundation shade NC 30 (Drugstore version). Check out the high end dupes ...

Labels

  • DIY
  • How to
  • Review
  • Youtube
  • dupes
  • lifestyle
  • makeup
  • monthly favourites
  • skin care
  • travel vlogs
  • vlogs

Blog Archive

  • October 2024 (1)
  • November 2022 (1)
  • January 2021 (3)
  • June 2020 (1)
  • May 2020 (1)
  • May 2019 (3)
  • November 2018 (6)
  • October 2018 (1)
  • December 2017 (1)
  • November 2017 (1)
  • August 2017 (2)
  • June 2017 (1)
  • December 2016 (2)
  • November 2016 (2)
  • December 2015 (2)
  • November 2015 (3)
  • October 2015 (4)
  • September 2015 (2)
  • July 2015 (3)
  • April 2015 (1)
  • January 2015 (2)
  • November 2014 (1)
  • September 2014 (2)
  • July 2014 (1)
  • May 2014 (3)
  • April 2014 (2)
  • March 2014 (13)
© 2015 BEAUTY BY LUPA. Powered by Blogger.

Created with by ThemeXpose | Distributed by Blogger Templates